Certera Docs
Welcome to the Certera docs! Scroll down to keep reading or use the menu on the left to select your topic.
Introduction
Certera is a Central Validation Server (CVS) for the ACME protocol (specifically for Let's Encrypt certificates). Certera is a self-contained web application you host and operate yourself. With Certera, through Let's Encrypt APIs, you can issue free certificates for all of your needs. If you're unfamiliar with Let's Encrypt, the ACME protocol and its concepts, please take a look here: https://letsencrypt.org/how-it-works/.
What exactly is a CVS?
A CVS is a server that centralizes the management of certain Let's Encrypt functions. On the Let's Encrypt integration guide page (https://letsencrypt.org/docs/integration-guide/), they define a Central Validation Server as the following: "If you want to use the http-01 challenge anyhow, you may want to take advantage of HTTP redirects. You can set up each of your frontends to redirect /.well-known/acme-validation/XYZ to validation-server.example.com/XYZ for all XYZ. This delegates responsibility for issuance to validation-server, so you should protect that server well. ... it may make sense, if you have a lot of frontends, to use a smaller subset of servers to manage issuance. This makes it easier to use redirects for http-01 validation, and provides a place to store certificates and keys durably."
Certera does exactly that and more. Here's a list of some of the current features:
- Track, analyze and receive notifications for certificate expirations, changes or issuance failures.
- Separates certificate issuance and the application of the certificates. In other words, Certera gives you greater flexibility by acquiring the certificate in one step allowing you to choose when and how that certificate is applied.
- Flexibility in using HTTP-01 or DNS-01 validation.
- Create, store and manage certificates and keys from a single place.
- Manage key rotations. This gives you the flexibility of managing the lifecycle of the keys used by your certificates. You choose when to rotate your private keys (which is helpful for managing certificate pinning).
- Works great for more complex scenarios (for a server farm or machines behind a load balancer). Because issuing certificates and applying them are clearly separate steps, and certificates are centralized in Certera, you can easily apply certificates onto a wide variety of interesting web server scenarios.
- Issue certificates for other systems, such as FTP or email servers.
- Helps manage rate limits by acquiring the certificate once and allowing you to work out how to best apply that certificate.
- Check OCSP status and revoke certificates with a single click.
- Much more to come...
License
Please refer to the full license for the exact terms pertaining to your use of Certera. We'll outline the basic points here.
There are two licenses available, Community Edition and Commercial Edition.
Community Edition
No limitations of any features or functionality. Basic support is available through the Certera GitHub issues page. Community Edition is free for those that meet any of the criteria:
- Registered non-profit organizations (e.g. 501(c)(3) and the equivalent in other countries)
- Personal or individual use
- Organizations whose main product is open-source (contact Certera for approval)
- Startups and organizations with less than $1 million USD in yearly revenue
Commercial Edition
Commercial Edition is for companies that do not meet the criteria above. A paid license is perpetual and gives you free upgrades for 1 year effective the purchase date. A 30 day trial is available. There are two versions of the Commercial Edition available.
Standard
- Limited to issuing up to 15 certificates and tracking up to 50 certificates - $300 USD
Enterprise
- Unlimited certificate issuance and tracking - $1000 USD
Support
Paid licenses come with e-mail support for 1 year (48 hour response time). Priority support is available for $500 USD per year and you get 8 hour response time via email.
Services
Certera can also provision, install and setup an instance for you upon request. Contact us for more details.
Giving Back
10% of all revenue will be split amongst the contributors of the open source technologies used to build Certera. The ratio is determined by utility and importance to the Certera project and is subject to change depending on what technologies are used. Percentage of share outlined in the attribution section below. If project does not accept revenue share, funds will go to a source of their choosing. Projects that are produced by for-profit institutions will not receive a share.
Is Certera open source?
Certera is technically "soure available". Open source, in the truest sense, means abiding by a license that the Open Source Initiative (OSI) has approved; Certera is not licensed as an approved OSI license, such as MIT or Apache-2.0.
Why is it licensed this way?
Certera has chosen this model for the fundamental reason that it is difficult to monetize open source projects. Certain kinds of projects work well for the existing OSI approved licenses. For example, open source projects that are linked to directly via compiled code can make it so that the consumers their work either open source their work or pay for an exclusion (i.e. are dual-licensed). Projects that are integrated with over, say a network connection, like a database engine, can use a license like AGPL. There exists a problem with a set of projects that are neither linked to directly via compiled code or accessed directly from other systems, like database engines. Certera, falls under a category of "tools" or "infrastructure components", not unlike a Content Management System (CMS) or a photo editing application. These kinds of applications are often licensed under "open core" terms. Meaning, a certain set of functionality is made available as open source, but other functionality is made available via a paid, non-open source license. Otherwise, they often rely on donations. For examples of the described scenarios above, please refer to the following projects:
- Alfresco CMS
- GIMP
- Qt
- Cockroach DB
- Many other countless examples...
Rather than attempting to split up the code to make it open core, it's simpler to use a non-OSI license, and adopt a "community edition" license that is also commonly found in "soure available" projects.
Terms
- You can view and modify the source code to fit your needs
- You can consume the Certera APIs freely without any limitations
- You can not redistribute or republish the source code
As you can tell, it's not hard to circumvent the above. Certera does not want to introduce license keys and code to limit functionality. If you'd like to walk the wild-side and not comply with the copyright license terms, you risk a lot more than the cost of the license.
Privacy
Certera's source code is available online and you are welcome, and encouraged, to review the code. There is no analytics, telemetry or phoning home of any kind. Certera is used to secure keys and certificates and needs to be as secure as possible. This is why Certera has decided to make the source code available. Comments, ideas and feedback regarding privacy and security are always welcome.
Source Code
Source code is available on GitHub: https://github.com/certera-io/certera
Feature Requests
Feature requests should be submitted in the GitHub issues page (with a "feature-request" label): https://github.com/certera-io/certera/issues
Issues
Similarly, issues and bugs should also be submitted in the GitHub issues page (with a "bug" label): https://github.com/certera-io/certera/issues
Attribution
Certera is built using the following technologies. As mentioned above, 10% of the revenue from the paid licenses will go back to help support and sustain open source projects that aren't already backed by big for-profit institutions. While the ratios may change over time, Certera is committed to always giving at least 10% of its revenue back to open source.
| Project | Revenue Share % | License |
|---|---|---|
| ASPNET Core | 0% | Apache-2.0 |
| BuildBundlerMinifier | 0% | Apache-2.0 |
| Certes | 3% | MIT |
| DnsClient.NET | 0.5% | Apache-2.0 |
| Entity Framework Core | 0% | Apache-2.0 |
| IconMoon/Font Awesome | 0% | Various |
| IPNetwork | 0% | BSD 2-Clause |
| Let's Encrypt* | 5% | MPL-2.0 |
| MailKit | 0% | MIT |
| Milligram | 0.5% | MIT |
| Milligram Admin Template | 0% | MIT |
| Nager.PublicSuffix | 0.5% | MIT |
| normalize.css | 0.5% | MIT |
| SQLite | 0% | Public Domain |
* Though not directly used via compiled code, Let's Encrypt APIs are consumed. They are also the Certificate Authority issuing the certificates.
Font: Sansation (SIL Open Font License v1.10)
Font author: Bernd Montag
Icon: Bullseye (Creative Commons)
Icon designer: Pieter J. Smits
Download
Please download directly from the GitHub releases page: https://github.com/certera-io/certera/releases
Install
Installation is quick and easy. Simply download the latest release and extract the contents into to a directory.
For the best experience, please run Certera manually, not as a service, for the first time to ensure there aren't any issues on your system. You can more easily see the console output when not running as a service. After Certera setup has completed successfully, it is recommended that Certera be configured to run as a service or daemon; this can ensure Certera is always running despite reboots.
Windows
To install as a service, you can use SC, NSSM or whatever method you prefer.
Be sure to open Services panel and view the created Certera service to ensure recovery options are to your liking.
Configure Certera to run as a service using SC.
sc create Certera binPath="<full_path_to_certera.exe>"
Configure Certera to run as a service using NSSM.
nssm install Certera "<full_path_to_certera.exe>"
Linux
First, run certera as the local user to make sure things start up correctly. You can configure to run as a service after.
First time running Certera as the local user.
# Get the link to the latest version here: https://github.com/certera-io/certera/releases/latest
wget https://github.com/certera-io/certera/releases/download/1.2.0/certera-1.2.0-linux-x64.zip

sudo apt install unzip

# unzip into the directory of your choosing, /opt or /usr/local or whatever your conventions are
sudo unzip certera-1.2.0-linux-x64.zip -d /opt/certera

cd /opt/certera

sudo chmod +x certera

# if running as local user, must allow access to bind to port 80 and 443
sudo apt-get install libcap2-bin
sudo setcap 'cap_net_bind_service=+ep' /opt/certera/certera

# run it the first time to see the logs more easily
./certera
Linux (service)
There are various ways to do this, but using systemd can be used.
Create the user that will run the certera application.
sudo useradd -m certerauser -p choose-your-password!123
Configure Certera to run as a daemon using systemd. (e.g. /etc/systemd/system/certera.service)
[Unit]
Description=Certera

[Service]
ExecStart=/opt/certera/certera
WorkingDirectory=/opt/certera/
User=certerauser
Restart=on-failure
SyslogIdentifier=certera
PrivateTmp=true

[Install]
WantedBy=multi-user.target
Because you're running the service as a user, you must ensure you've given the process permission to bind to port 80/443.
Grant access to the certerauser to certera directory
sudo chown -R certerauser /opt/certera
Reload systemd and define the Certera service
sudo systemctl daemon-reload
sudo systemctl enable certera.service
Start the Certera service
sudo systemctl start certera.service
sudo systemctl status certera.service
Upgrade
Upgrading is a trivial process. Simply stop the service, copy over the bits and restart the service. Do not copy over files that contain user-specific changes, such as config.json and appsettings.json.
Linux
First, run certera as the local user to make sure things start up correctly. You can configure to run as a service after.
# Download and unzip
wget https://github.com/certera-io/certera/releases/download/1.2.0/certera-1.2.0-linux-x64.zip
unzip certera-1.2.0-linux-x64.zip -d certera-1.2.0

cd certera-1.2.0/

# Stop the current Certera service
sudo systemctl stop certera.service

# Don't copy appsettings.json or config.json as those may contain user modified values
sudo cp -r certera version.txt web.config wwwroot /opt/certera

# Allow port 80/443 binding
sudo setcap 'cap_net_bind_service=+ep' /opt/certera/certera

# Start the Certera service
sudo systemctl start certera.service
Setup
After installation is complete. Execute the certera binary that runs the web application. Then, navigate to http://localhost. Setup will guide you through creating an administrator account, an ACME (Let's Encrypt) account, configure the server details and acquire your first certificate automatically. Certera will then restart where you can then login and get started issuing and tracking certificates.
Account
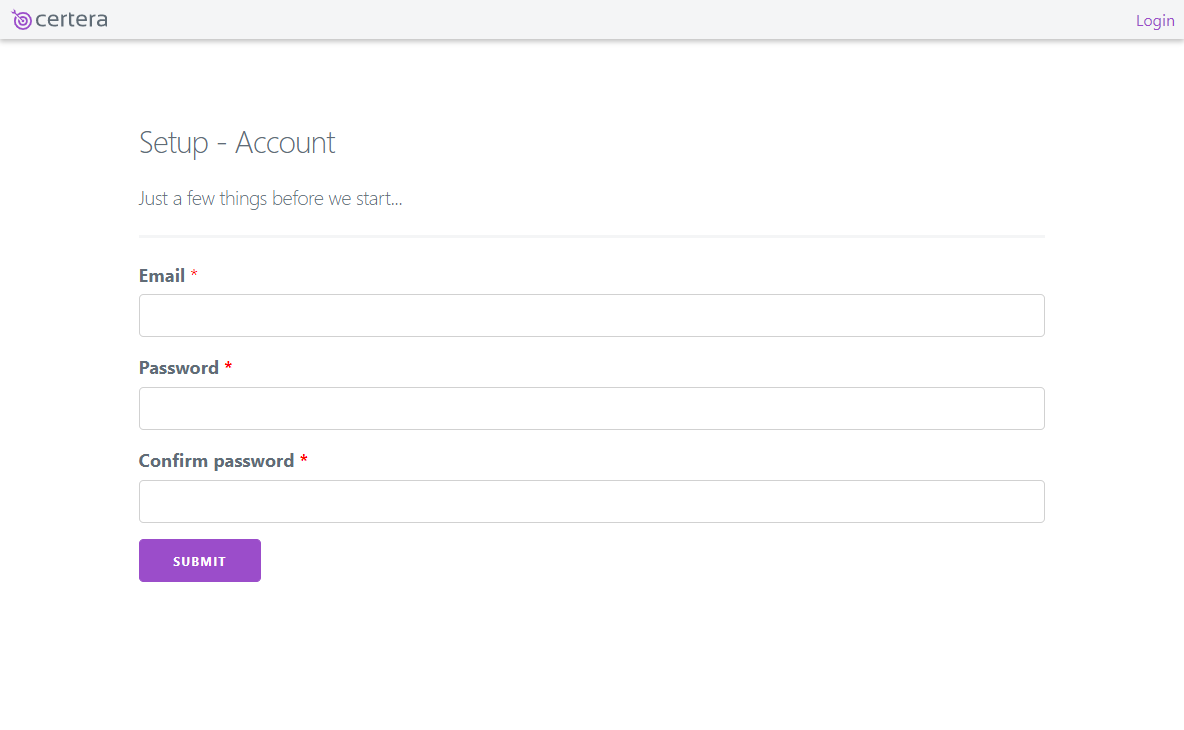
The first step is to create an account. For now, there isn't an option to create accounts for multiple users.
ACME Account
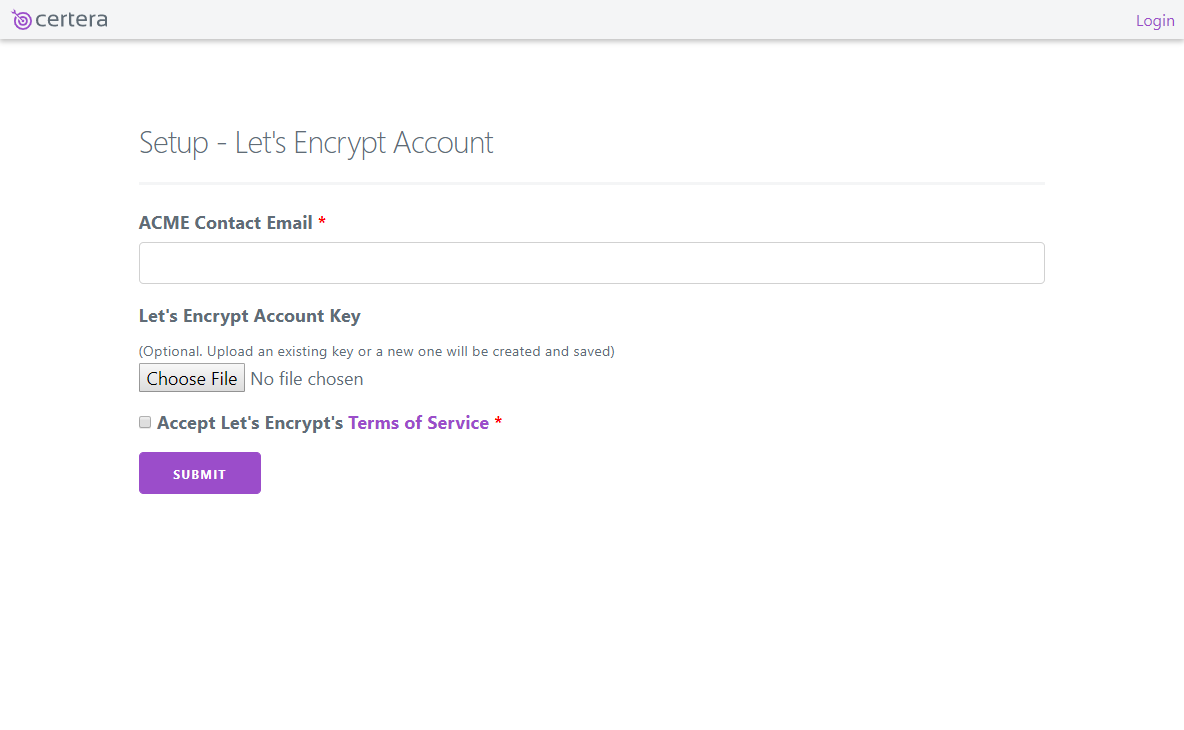
Here you can configure your Let's Encrypt user account. If you have an existing key you'd like to use, you can upload that or create a new account.
Server
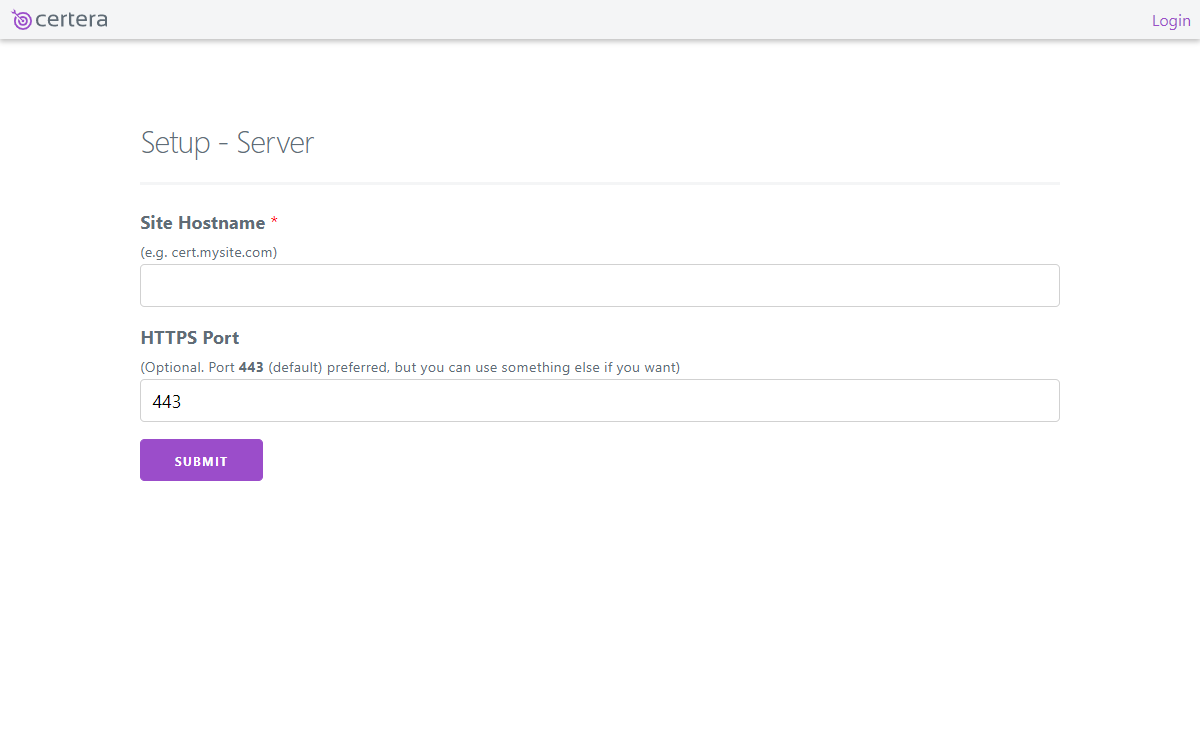
This is the site's host name that will be accessible via HTTPS later.
Certificate
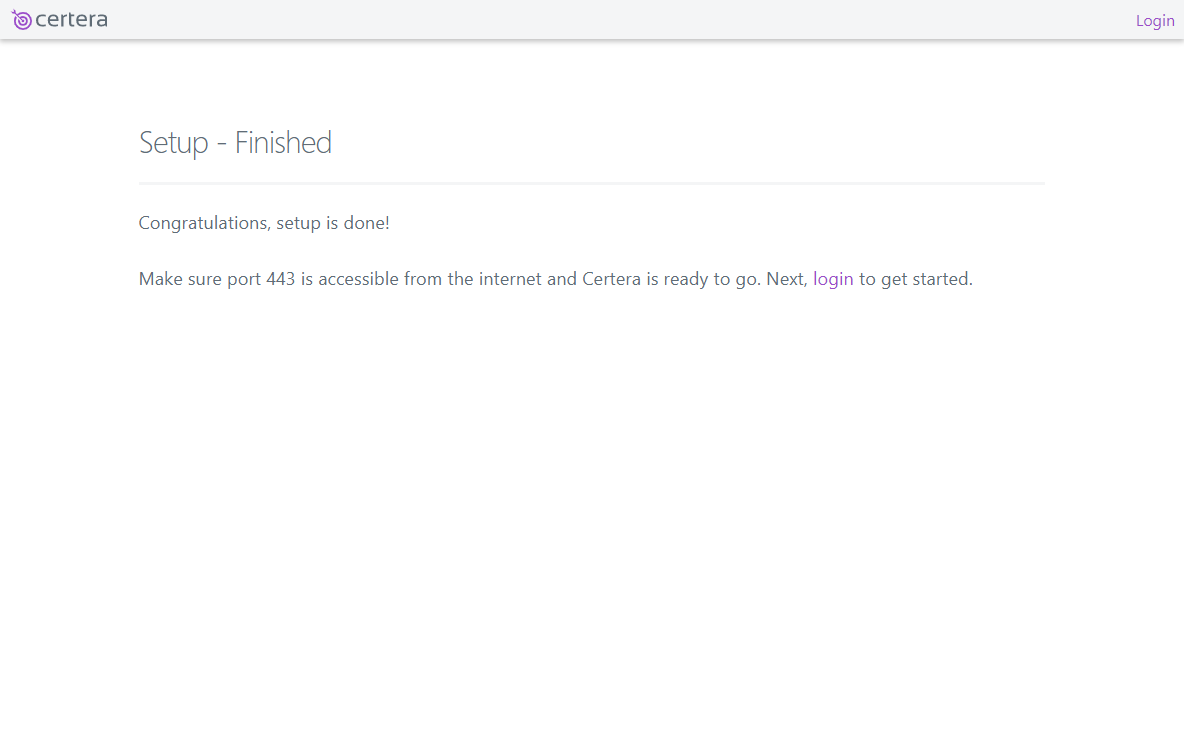
At this point, installation is nearly complete. Certera will obtain and store a certificate to be used for the site. This typically takes less than 1 minute to complete. After a certificate is successfully acquired, the site will restart automatically and you can login to begin issuing and tracking certificates.
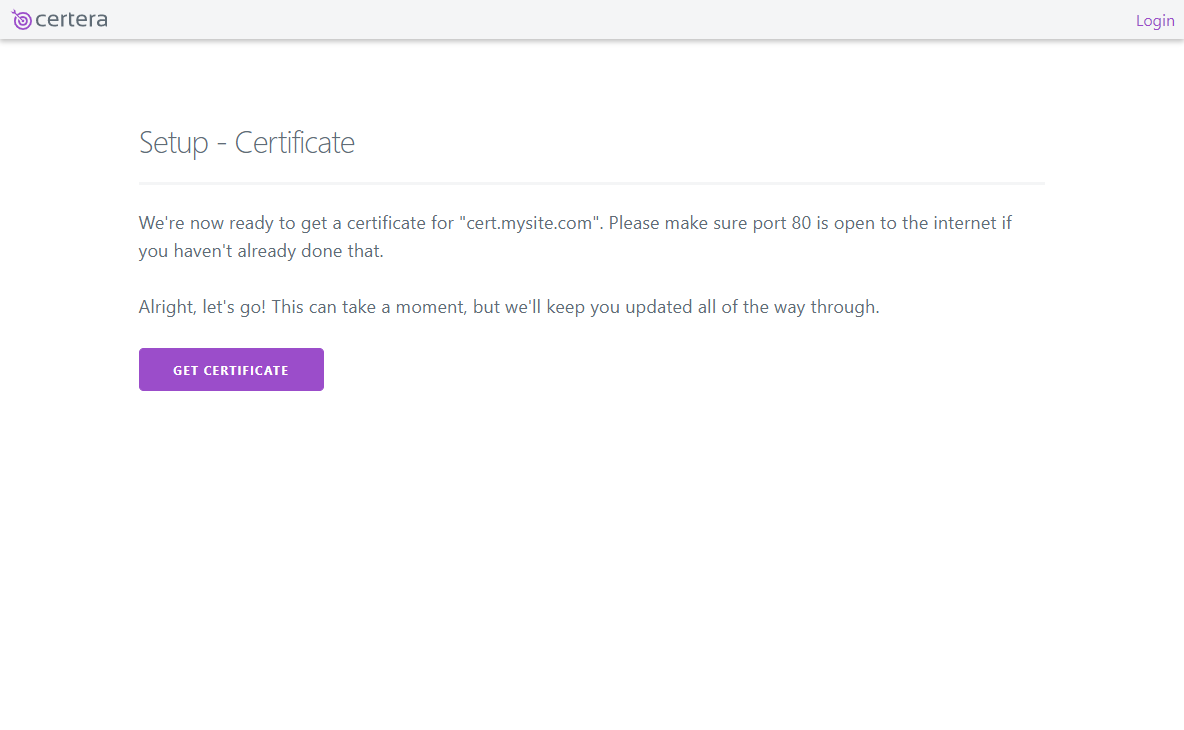
Wait a moment for Certera to restart and the page will refresh automatically.
Configuration
There are more configuration options to configure that aren't available via the setup steps above. Be sure to open the config.json file to configure the allowed remote IPs that are allowed to connect. Without configuring this, only the "/.well-known/acme-challenge" endpoint is accessible to the outside world.
IP ACL
The config.json file has a section where you can configure two sets of IPs to be allowed to access the Admin UI and the API. By default, only local connections and connections to the "/.well-known/acme-challenge" is allowed (because Let's Encrypt does not publish the IP addresses of their ACME servers).
By default, no external connections are allowed to the Admin UI or the API. If you're setting this up on a VPS or cloud, you will need to change this to access your Certera instance in order to perform the setup steps.
"AllowedRemoteIPAddresses":
{
    "AdminUI": "",
    "API": ""
}
SMTP
Before you can receive notifications from your Certera Central Validation Server, you must configure your SMTP settings in the config.json file
No SMTP configuration exists by default. You must specify the SMTP configuration before you can receive notifications.
"SMTP": {
    "Host": "",
    "Port": 25,
    "Username": "",
    "Password": "",
    "UseSSL": true,
    "FromName": "MySite Certs",
    "FromEmail": "noreply@mysite.com"
}
Admin UI
The Admin UI (or web UI) is where you can issue and track certificates, create ACME accounts, create and manage private keys and more.
Security
The Admin UI is protected using the email and password you used during setup. Certera creates an encrypted cookie that expires after 20 minutes of inactivity. There is also an option to enable 2 factor authentication by clicking on your email at the top right of the Admin UI. Certera also uses CSRF protection on POST requests. Certera does not reference external files of any kind (Javascript, css, images, fonts or otherwise). Certera also works with Javascript disabled.
Tracking Page
The tracking page allows you to track various kinds of certificates. The easiest way is to simply specify the URLs directly via the tracking edit page. Sometimes, you may have a certificate that is not accessible via a URL. Simply upload the public portion of the certificate for tracking via the tracking edit page. Finally, the certificates that are managed and issued through Certera are automatically tracked.
On the tracking edit page, you can define the sites whose certificates you wish to track. You may also upload the public certificates manually for tracking.
ACME Accounts Page
Here you can manage the ACME accounts. One is automatically created during setup to obtain the Certera site certificate. You may want to create a staging Let's Encrypt account to issue staging certificates for testing purposes.
Keys Page
Certera manages storing and associating keys with certificates and ACME accounts. You can create a new key to rotate a certificate's private key at your desired interval.

Certificates Page
Here you can manage certificates issued by Let's Encrypt. You can view the history of the certificate issuance for a particular certificate by clicking on it. You can also check OCSP status and revoke the certificate.

When creating a certificate, you can specify extra Subject Alternative Name values, which key to use and Certificate Signing Request details.

Notifications Page
Control what kinds of notifications you'd like to receive from Certera. Certera can send notifications via Email or Slack. You must have SMTP configured in order to receive Email notifications.

Settings Page
Here you can manage how many days before the certificate expires to perform renewal. Certera allows you to specify a script when performing certificate requests that use the DNS-01 Challenge type.

API
API Security
API is secured using an API key specified via the "apiKey" header value. Each certificate and key has 2 API keys that can be rotated as needed or desired.
Certificates API
The certificate endpoint is the following: https://<your_certera_site_hostname>/api/certificate/<certificate_name>
Here, you can obtain the certificate you've acquired from Let's Encrypt. You can choose to receive the certificate in PEM or PFX (base 64 encoded) format. Certificates returned by the API contain the entire certificate chain. If you wish to only retrieve the certificate without the chain, please use chain=false in the API call.
curl https://<your_certera_site_hostname>/api/certificate/<certificate_name> \
  -H "apiKey:<your_api_key>"
There are some optional query string parameters you can specify, default values first:
staging=false|true
format=pem|pfx
pfxPassword=<your_pfx_password>
chain=true|false
You can pass extra parameters to the certificate endpoint like this:
curl https://<your_certera_site_hostname>/api/certificate/<certificate_name> \
  -H "apiKey:<your_api_key>" \
  -d "staging=true&format=pfx&pfxPassword=$3cr3t" \
  -G
Keys API
The key endpoint is the following: https://<your_certera_site_hostname>/api/key/<key_name>
Here, you can obtain the private key used to generate the certificate. You can choose to receive the key in PEM or DER (base 64 encoded) format.
curl https://<your_certera_site_hostname>/api/key/<key_name> \
  -H "apiKey:<your_api_key>"
There is an optional query string parameter you can specify, default value first:
format=pem|der
You can pass extra parameters to the key endpoint like this:
curl https://<your_certera_site_hostname>/api/key/<key_name> \
  -H "apiKey:<your_api_key>" \
  -d "format=der" \
  -G
Integration
You may choose either HTTP-01 or DNS-01 validation method to validate ownership of the domain for which you're attempting to obtain the certificate. For more information, please refer to the following documentation: https://letsencrypt.org/docs/challenge-types/
HTTP-01
HTTP-01 validation means that when you request a certificate, the ACME server will attempt to verify a challenge via the "/.well-known/acme-challenge" endpoint. You must redirect this endpoint from your site to your Certera instance. For example, if you host your Certera instance on cert.mysite.com and you wish to obtain a certificate for ftp.mysite.com, you would setup an HTTP redirect on ftp.mysite.com so that when requests made to "http://ftp.mysite.com/.well-known/acme-challenge", they would be redirected to "http://cert.mysite.com/.well-known/acme-challenge". You may use various methods as it depends on the web server technology you use.
IIS/ASPNET web.config:
<?xml version="1.0" encoding="utf-8"?>
<configuration>
  <system.webServer>
    <rewrite>
      <rules>
        <rule name="Redirect ACME Challenge" stopProcessing="true">
    	  <match url="(.*)" />
            <conditions logicalGrouping="MatchAll" trackAllCaptures="false">
              <add input="{REQUEST_URI}" pattern="^\/\.well-known\/acme-challenge\/.*" />
            </conditions>
            <action type="Redirect" url="https://<your_certera_site_hostname>/{R:1}"
					redirectType="Temporary" />
         </rule>
      </rules>
    </rewrite>
  </system.webServer>
</configuration>
Apache .htaccess:
RedirectMatch 302 ^(?!/\.well-known/acme-challenge/).* https://<your_certera_site_hostname>/$1
NGINX conf:
location ^~ /.well-known/acme-challenge/ {
  default_type "text/plain";
  rewrite /.well-known/acme-challenge/(.*) https://<your_certera_site_hostname>/.well-known/acme-challenge/$1 break;
}
DNS-01
DNS-01 validation means that ACME will validate ownership of the domain by ensuring the challenge exists in a particular DNS record for a domain you're attempting to obtain a certificate for. For example, if you wish to obtain a certificate for ftp.mysite.com, the token that ACME will check for must exist as a TXT record with the following name: _acme-challenge.ftp.mysite.com
To configure DNS-01 validation, please refer to the settings page.
API Clients
When attempting to retrieve a certificate or key stored within your Certera instance, you can use anything that can make an HTTP request. The response isn't in JSON or XML, so simply write the response to a file. cURL, PowerShell, etc. all work great. You simply make an API call to the certificate or key endpoint and write the result to a file.
Applying Certificates
How you apply your certificate will vary depending on web server software and operating system. There are plenty of examples online of how to do this, but we'll start collecting examples for the most common scenarios and put them in a repo and link them here.
Coming Soon
- Automate rotating short-lived certificates that are exchanged with 3rd parties (when they're used for SAML SSO or client authentication).
- ACME API quota tracking - view how many calls to ACME endpoints are being made to ensure you're within the limits.
- Users and roles - be able to control access to certain keys and certificates within your organization (i.e. separation of roles).
- Storing certificates and keys in an HSM.
- and much more!
Be sure to submit feature requests via the GitHub page.
